
I offered to bring tarts to a dear friend’s family Thanksgiving and found this recipe as I was considering my repertoire. Also, geeky-dessert talk: I’m a huge fan of Ikeda Riyoko’s The Rose of Versailles (Beru Bara) fan*, so how could I pass up the tarte bouquet de roses?

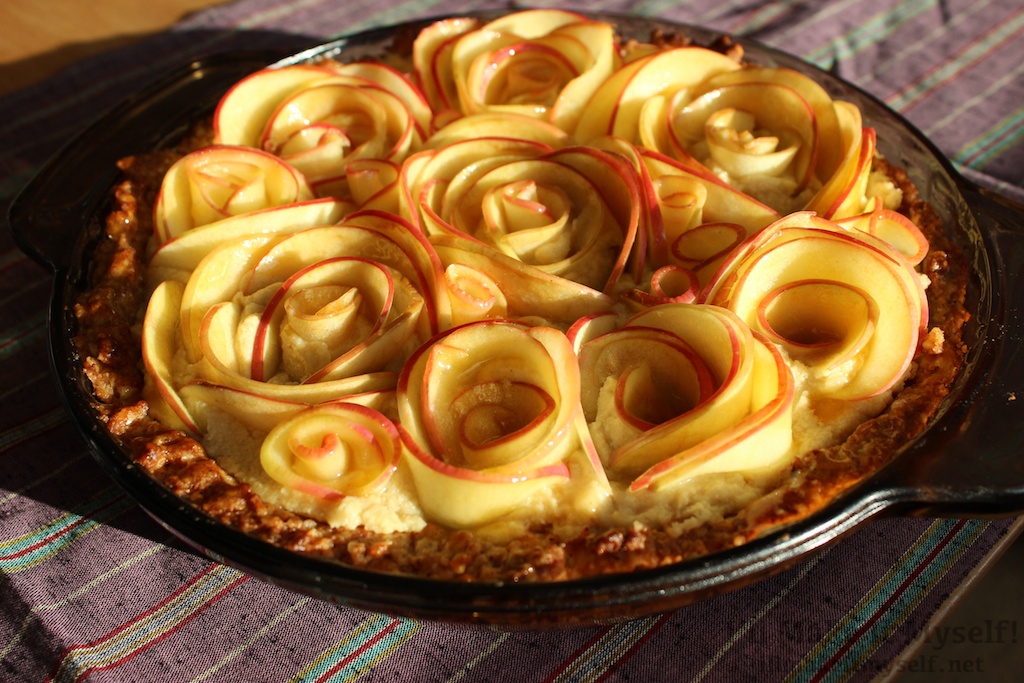
This tart looks and tastes elegant: the freshness of the (mostly) uncooked apples with the creamy maple custard and soft walnut crust creates a great combination of flavors and textures. In Alain Passard’s version, he cuts the apples with a machine into long strips, but those of us without mandolins can (carefully) slice the apples into paper-thin, translucent pieces.
The original recipe calls for Macoun apples; I used Pacific Rose. You’ll want a crispy, sweet eating/dessert apple with a relatively thin, colorful skin. Because (the commenters and) I had so much trouble with the custard and apples during the test run, I beefed up the details in the instructions. I tend to learn baking skills as needed; by my second time, I had figured out the rosettes, and by the third time, I felt really confident with the custard. I’ve tried to make the instructions as detailed as possible and there’s an image gallery of some of the more difficult steps. If you’re not a natural-born pastry chef, give yourself a test run before you serve it to guests.
Japan notes: except for finding bulk walnuts (check the import stores or gourmet stores if your supermarket doesn’t carry more than 50 g at a time) and possibly the maple syrup, all the ingredients are easy to find. Jonagold apples will work well.


Apple Tart with Maple Custard and a Walnut Crust
Adapted from Baking a Moment‘s guest post (via Baking a Moment). Gluten free. Serves ~10.
Time: ~1.5 – 2 hours Crust: ~25 minutes (10 active, 15 baking) Custard: ~60 minutes (30 active, 30 cooling) Apple roses/decoration: ~40 minutes–can be partially done while custard cools
Walnut Crust
- 2½ cups (305 g) walnuts (kurumi, クルミ)
- 4 Tablespoons (56 g) unsalted butter (muen batâ, 無塩バター)
- 2 Tablespoons granulated sugar (guranyu tô, グラニュー糖)
- 1 egg white (tamago, 卵)
- ¼ teaspoon salt (shio, 塩)
Equipment
- 1 9-in (22 cm) tart pan. I used a glass pie pan; the original recipe recommends a pan with a removable bottom.
- Food processor (fûdo purosessa, フードプロセッサ) or blender (mikisâ, ミキサー))
- Silicon spatula (shirikon hera , シリコンヘラ)
Procedure
- Preheat the oven (yonetsu, 予熱) to 400°F / 200°C. Grease the pan.
- Melt the butter and set aside.
- Process the walnuts until finely ground.
- Mix the ground walnuts with the butter, egg, sugar, and salt.
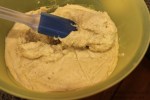
- Using a silicon spatula, scrape the mixture into the greased pan and press it evenly over the bottom and up the sides.
- Bake for 12-15 minutes.
Maple Custard
- ¼ cup (32 g) cornstarch (kônsutâchi, コーンスターチ)
- ¼ teaspoon kosher salt (shio, 塩)
- 1 cup (240 mL) heavy cream (hebî kurîmu, ヘビー・クリーム)
- ½ cup (120 mL) milk (gyunyu, 牛乳)
- ½ cup (120 mL) pure maple syrup (mêpuru shiroppu, メープルシロップ)
- 2 teaspoons vanilla extract (banira essensu, バニラエッセンス)
- 4 eggs (tamago, 卵)
Equipment
- 1 medium pot
- 2 medium bowls
- 1 medium heat-proof bowl
- 1 whisk (awadateki, 泡立て器)
- 1 ladle (otama, おたま)
- 1 fine mesh strainer (koshiki, こし器)
- 1 silicone spatula
- Cling wrap (rappu, ラップ)
- In one medium bowl, mix together the cream, milk, maple syrup, and vanilla. Set aside.
- In the other medium bowl, whisk the eggs and set aside.
- Add the corn starch and salt to the pot and mix them together.
- Slowly pour the cream-milk mixture into the pot while whisking to avoid lumps. Turn the heat to medium and continue to whisk until the pot just begins to simmer.
- Turn the heat to low. Ladle about half a cup of the mixture into the bowl with the eggs and whisk to incorporate. Add a little more of the hot cream to raise the temperature of the eggs. When the eggs are warmed, pour the egg mixture into the pot and whisk vigorously over low heat to prevent burning.
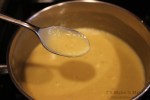
- The custard will thicken a bit and then thicken a lot, and when it has thickened to a pudding-like consistency (see photo), take it off the heat.
- Set out the heat-proof bowl. Pour some of the mixture into a fine-mesh strainer and push it through with the silicone spatula; do this until all the custard has been pushed through.
- Press the cling-wrap onto the custard to prevent a skin from forming. Cool in the refrigerator. Mine usually takes 30 minutes, but my refrigerator runs cold.
If you messed up and the custard didn’t set, don’t worry! Gently heat it again over the stove until it properly thickens, then cool it again.
Apple Roses
- 2 apples (I used Pacific Rose) (ringo, リンゴ)
- juice of a lemon, divided (remon, レモン)
- ~1.5-2 TBSP smooth apricot jam (apurikotto jamu, アプリコット・ジャム)
Equipment
- Large, sharp knife
- Medium bowl
- A large plate
- Paper towels
- Small heat-proof bowl
- Pastry brush (pesutorî burashi, ペストリーブラシ)
Procedure
- Fill the (non-heatproof) bowl about with water and add the lemon juice.
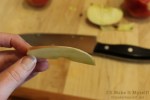
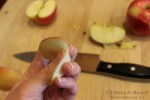
- Leave the skin on and quarter the apple. (Leave your skin on, too.) Lay the apple flat with the flesh-side down and carefully cut it into paper-thin slices (see photo). The slices should be so thin that they are somewhat flexible and, depending on the apple, translucent.
- Place apple-slices in the bowl of lemon water (add water as needed).
- When you are finished slicing the apples, and the custard is cooled, spread the custard into the crust and smooth with the silicone spatula.
- Place some of the apples onto the plate, arranging them so they are flat and not overlapping much. Microwave for ~30 seconds. Pat dry with the paper towel.
- Carefully roll one of the apple slices into a spiral and set into the center of the custard. Bend and arrange the other apples by setting them in the custard around the center like a rose’s petals. Add more rosettes to the pattern. Some slices may break. Set them aside (and eat later).
- Repeat the heating and rolling as needed until the tart is filled.
- Mix the jam with a little water and lemon juice in the heatproof bowl. Heat for ~10-20 seconds in the microwave. Paint onto the apple slices with a pastry brush. This will help prevent browning and give the tart some shine.
- If you used a removable tart pan, remove it. Best cut with a sharp knife. Store in refrigerator.
If for some reason you haven’t sliced the apples thin enough, you can arrange them flat in a spiral like a standard tart. The day is not lost.
薔薇は薔薇は。。。
*One could devote a whole post to food scenes in Beru Bara…or a series to the ones in Ôoku…

One Comment
Comments are closed.